 Save to Pinterest
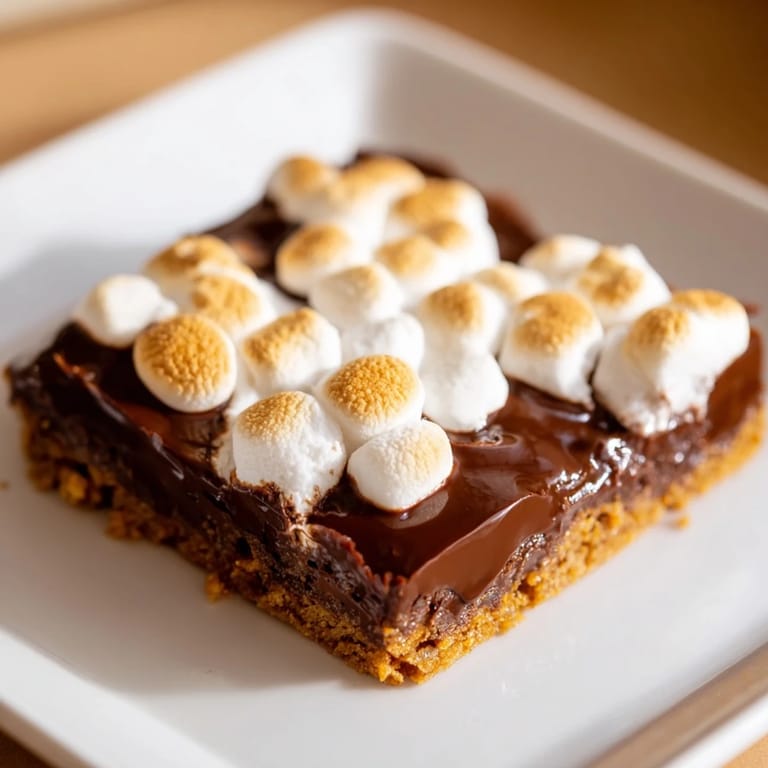
 There's something about biting into a s'more that instantly transports you back to sitting around a crackling fire, chocolate melting on your fingers, the night sky full of stars. But here's the thing: not everyone has access to a campfire, and sometimes you just want that nostalgic flavor without the hassle of roasting marshmallows over flames. These s'mores bars came into my life on a rainy afternoon when my sister texted asking if we could recreate our favorite campfire memory indoors. I pulled together a few pantry staples, and within an hour, we were biting into these buttery, gooey bars that tasted like summer even though it was pouring outside.
I brought a batch to my office potluck last spring, and watching people's faces light up as they took that first bite reminded me why simple, nostalgic foods matter so much. One coworker closed her eyes mid-chew and said, "I haven't tasted anything this good in years," which might sound dramatic, but it perfectly captured the magic of these bars. They disappeared faster than anything else on the table that day.
Ingredients
- Graham cracker crumbs: The foundation of your crust, providing that distinctive slightly sweet, toasty flavor that defines s'mores. I use a food processor to crush whole graham crackers fresh, which gives a better texture than store-bought crumbs.
- Unsalted butter, melted: This binds the crust together and keeps it tender and rich. Melting the butter beforehand ensures even distribution.
- Granulated sugar: A touch of sweetness in the crust balances the bitter notes from the chocolate layer. Don't skip it, even though it seems small.
- Semi-sweet chocolate chips: The workhorse of the middle layer, melting smoothly and holding their shape long enough to spread. I've learned that quality matters here, so choose a brand you actually enjoy eating on its own.
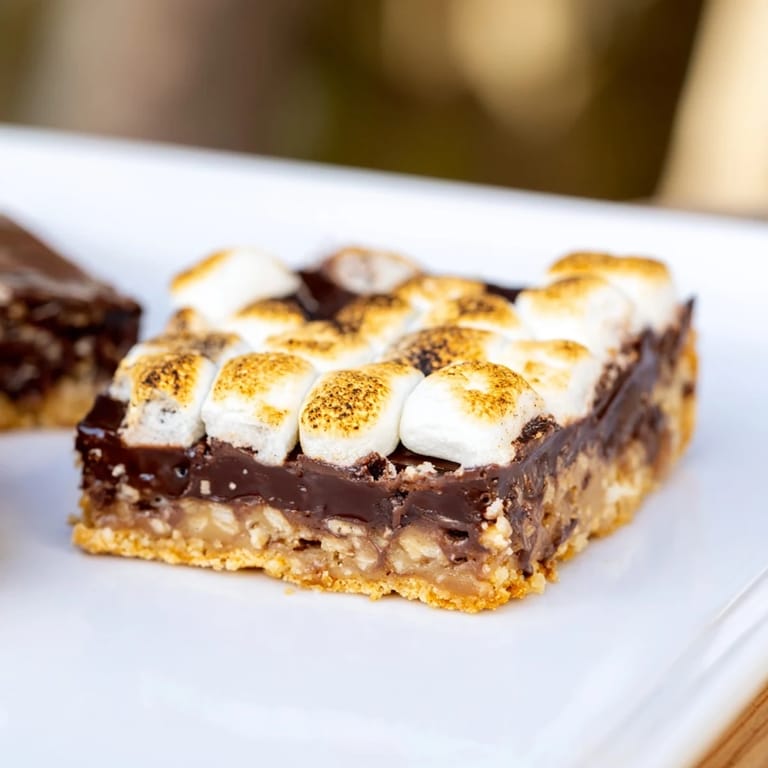
- Mini marshmallows: These stay fluffy and develop those gorgeous golden peaks when baked. Regular-sized ones tend to get too dark before softening through.
Tired of Takeout? 🥡
Get 10 meals you can make faster than delivery arrives. Seriously.
One email. No spam. Unsubscribe anytime.
Instructions
- Prepare your pan:
- Line your baking pan with parchment paper, letting the edges hang over the sides. This makes lifting the entire batch out later effortless and keeps cleanup minimal. Preheat your oven to 350°F.
- Build the crust:
- Combine graham cracker crumbs, melted butter, and sugar in a bowl until everything feels like damp sand. Press this mixture firmly and evenly across the bottom of your prepared pan, using the back of a measuring cup or your fingertips to pack it tight and level.
- Toast the base:
- Bake the crust for 8 minutes until it's set but not yet browning. You want it warm and stable for the chocolate layer.
- Melt the chocolate:
- Sprinkle chocolate chips over the warm crust and return it to the oven for exactly 2 minutes. The residual heat softens the chocolate without cooking it. Remove it and spread with a spatula until smooth and even, working quickly while it's still warm.
- Add the marshmallows:
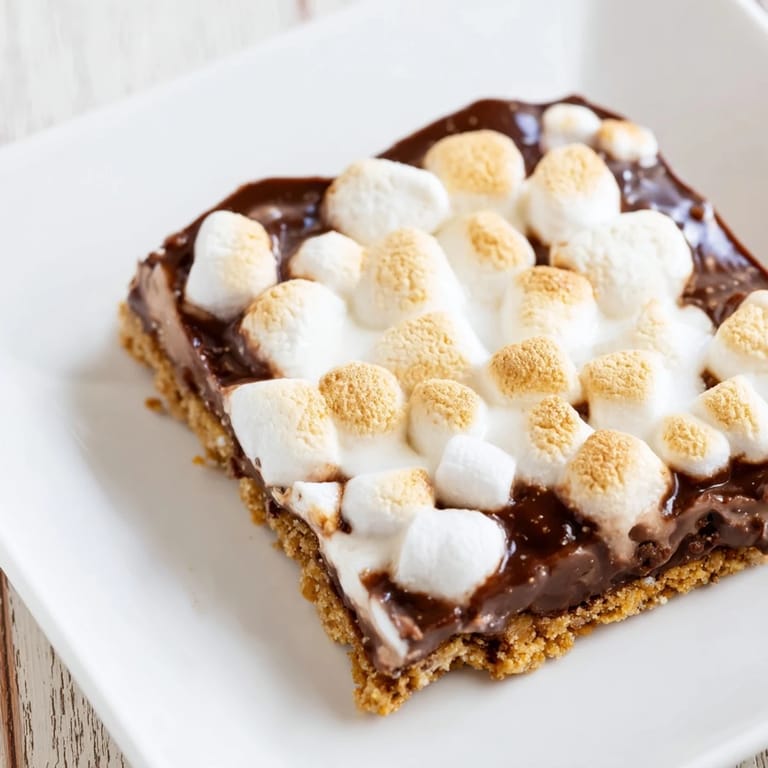
- Scatter mini marshmallows across the chocolate, pressing them gently down so they sink slightly into the warm chocolate. This helps them toast evenly and creates little pockets of flavor throughout.
- Toast to golden:
- Bake for 10 to 12 minutes, watching as the marshmallows puff up and turn golden brown on top. The exact time depends on your oven, so keep an eye on them in the final minutes.
- Chill and cut:
- Let the bars cool completely in the pan at room temperature, then refrigerate for at least an hour. Cold bars are easier to cut into clean, uniform pieces. Use the parchment paper overhang to lift the entire slab out, then slice into 16 squares.
 Save to Pinterest
 My nephew, who is usually picky about desserts, ate three of these bars in a row and asked me to make them for his birthday party. That's when I knew they'd become something special in our family rotation, no campfire required.
Flavor Variations Worth Trying
Once you master the base, these bars invite endless tweaks. A pinch of sea salt sprinkled into the crust adds a sophisticated edge that balances the sweetness beautifully. If you're a dark chocolate devotee, swap in dark chocolate chips for a deeper, less sweet bars. I've also experimented with milk chocolate for friends who find semi-sweet too intense. Digestive biscuits make an excellent graham cracker substitute and create a slightly nuttier flavor profile.
Storage and Serving Tips
These bars are best enjoyed within three days of making them, stored in an airtight container at room temperature or in the fridge. Interestingly, they taste different depending on temperature: straight from the fridge, they're dense and fudgy, while serving them at room temperature or slightly warmed brings back that soft, gooey campfire quality. If you want maximum gooeyness, warm a bar in the microwave for 10 seconds just before eating.
Why These Bars Win Every Time
What makes s'mores bars special isn't just the combination of familiar flavors, but the feeling they create. They're nostalgic without being boring, easy enough for a beginner to nail, yet impressive enough to share with people you want to impress. The magic happens in those final minutes of baking when the marshmallows transform, puffing up and turning golden while the chocolate underneath stays soft and rich.
- Make these bars on a rainy day when you're craving a cozy dessert without leaving the house.
- Double the batch and freeze extras for unexpected guests or your own midnight snack.
- Serve them slightly warm with cold milk for the ultimate comfort food pairing.
 Save to Pinterest
 These s'mores bars have become my go-to dessert for moments when I want to feel the warmth of a campfire without leaving my kitchen. Whether you're feeding a crowd or treating yourself, they deliver that nostalgic magic every single time.
Recipe Questions & Answers
- → What kind of chocolate works best for these bars?
Semi-sweet chocolate chips provide a balanced sweetness and melt evenly, creating a smooth layer that pairs well with toasted marshmallows.
- → Can I substitute the graham crackers with another crumb base?
Yes, digestive biscuits or similar slightly sweet crackers can be used to maintain the buttery, crumbly crust texture.
- → How do I achieve perfectly toasted marshmallows on top?
Bake the assembled bars until the marshmallows turn golden and puff slightly, usually around 10-12 minutes at 350°F (175°C).
- → Is chilling the bars necessary before slicing?
Chilling firm up the layers and helps achieve clean, neat slices without sticking or crumbling.
- → Can I add extra flavor to the crust?
Adding a pinch of sea salt enhances the buttery notes, and using milk chocolate can yield a sweeter taste.